Thursday, May 29, 2014

How to move from Gmail to Outlook.com

Set up Gmail email forwarding

From now on you’ll want all email messages that come to your Gmail account to get forwarded to your Outlook.com account. Easy enough:

Step 1

Sign into your Gmail account and click Settings.


Step 2

Click the Forwarding and POP/IMAP tab, then click Add a forwarding address.


Step 3

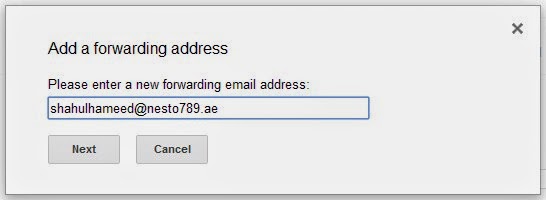
Enter your Outlook.com email address, then click Next. Confirm the address by clicking Proceed.


Step 4


Keep that Gmail tab or window open. In another tab or window, open your Outlook.com account and look for an email from Gmail with a verification code.

Step 5

Back in the Gmail tab, type or paste that code into the “confirmation code” field, then click Verify.


Step 6


Enable Forward a copy of incoming mail to [your Outlook.com address], then choose whether to keep, archive, delete, or simply mark-as-read the original Gmail copy of each message.

Step 7
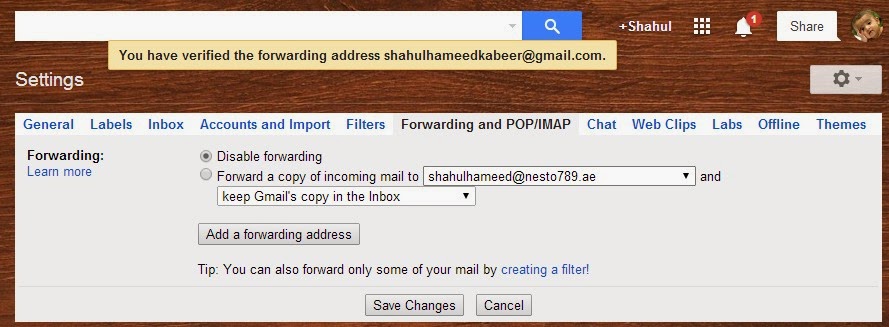
Scroll down to the bottom and click Save Changes.


Sunday, May 25, 2014

How To Lock - Unlock & Give Password To A Hard Drive in Windows 7

BitLocker

Step 1


Attach your external hard drive to your Windows 7 Ultimate or Enterprise computer and power on the drive.

Step 2

Click "Start | Control Panel | BitLocker Drive Encryption" to open the BitLocker program.


Step 3

Click "Turn On BitLocker" next to your listed external hard drive.


Step 4

Check "Use a Password to Unlock the Drive" and enter a password in the "Type Your Password" and "Retype Your Password" fields, making sure the password is the same in both fields. Click "Next."


Step 5

Click "Save the Recovery Key to a File" choose a save location on your main hard drive and click "Save." Alternatively, insert a USB flash drive in your USB port, click "Save the Recovery Key to a USB Flash Drive" and click "Save." Either option creates a recovery key, so you can decrypt the drive if you forget your password. Click "Next."


Step 6

Click "Start Encrypting" to encrypt the drive and require a password for subsequent access. The encryption process can take several minutes --or even hours-- to complete, depending on the size of your drive and your processing power.


HOW TO HIDE AND UNHIDE ANY DRIVE THROUGH COMMAND PROMPT

How to hide any drive through command prompt

Step 1 

Open command Prompt, go to Start Menu > All Programs > Accessories > Command prompt

Step 2

In the Command Prompt, type Diskpart and hit enter key. If UAC (User Account Control), dialog-box prompts than click Yes.

Step 3

Then type List Volume and press enter, this will produce the list of all drives.

Step 4

Now select the drive which you want to hide, you can either do this by typing Select Volume 3 (i.e. Volume Number) or by typing Select Volume E (i.e. Drive letter) 

Step 5

To hide a drive, type Remove Letter E. Here, E is the drive letter than you want to hide. You can use any drive letter you want.


Step 6

That’s it. You are done! E drive is now hidden


How to unhide hidden drive through command prompt

Step 1

Follow the procedure mentioned in step 1, 2, 3 and 4.

Step 2

To show the hidden drive type Assign Letter E and hit enter, now you can view E: drive in explorer.

 
Step 3

That’s it. You are done! E drive is now Unhidden